How To Set Up Your Xero Account For JobKeeper
JobKeeper 2.0 launched in Australia today and our friends over at Xero have implemented some changes to help make it easier for you to access these payments!
Are you eligible for JobKeeper 2.0?
Do you also have eligible employees (i.e. you are not a sole trader)?
Finally, do you use Xero software?
If yes, then keep reading as we are going to walk you through the changes you can make in the Payroll section of your file!
XERO JOBKEEPER CHECKLIST
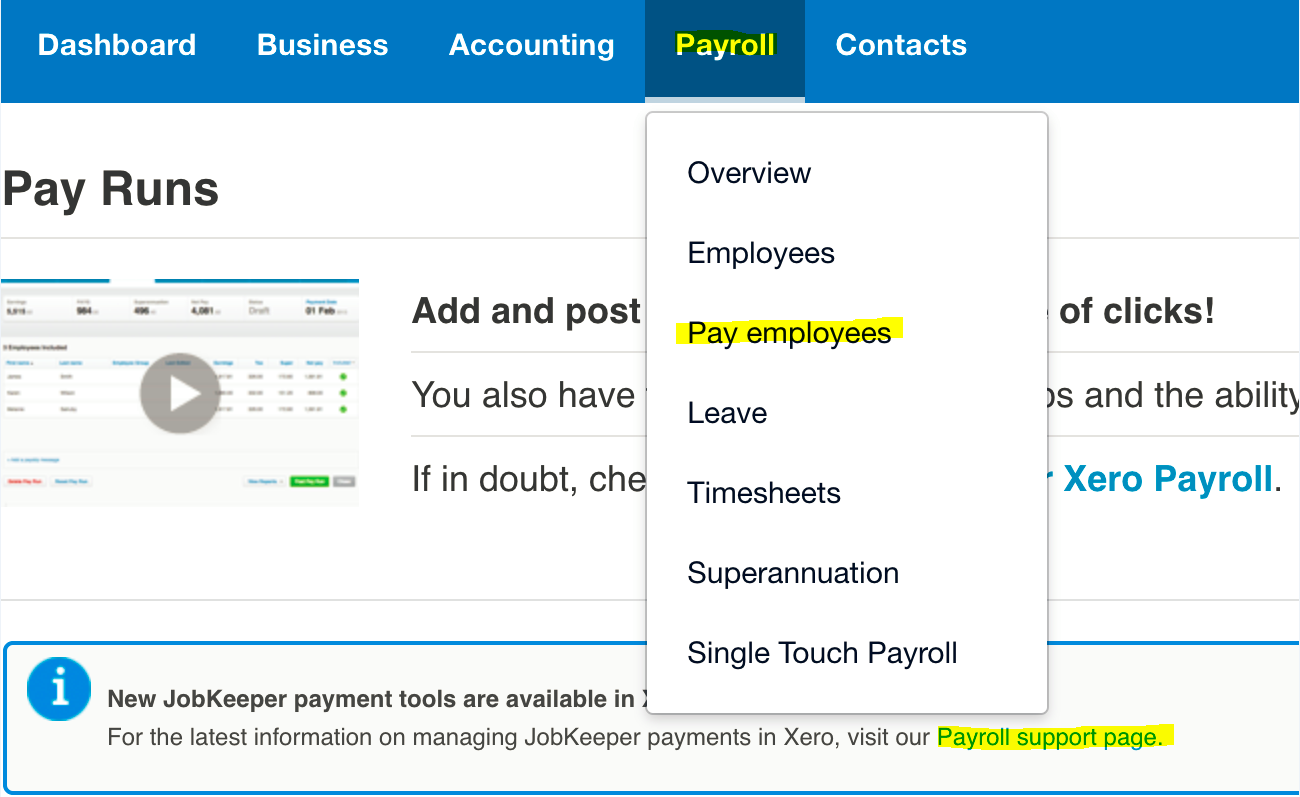
First things first, you should work through the Xero checklist that helps you get ready for the JobKeeper payments. You can find this by:
Logging into your Xero account
Selecting Payroll > Pay Employees
Selecting the link in the information box “Payroll support page”

If you have any issues regarding the checklist, please reach out and we can talk you through it!
PAYMENTS/TIERS
The Australian Government has introduced two tiers for JobKeeper payment rates. You can read more about the updated payment rates here.
In Xero Payroll, you can assign a tier to a JobKeeper recipient.
Simply choose an employee and click ‘Set Tier’.

Next, select the correct tier from the dropdown menu.

Then when filing your next pay run, Payroll will assign the correct codes to the eligible employee.
As always, if you need any assistance please feel free to reach out to us via email!